Monday, 24 September 2012

A Fun Day Layering and Distressing Fabrics!

What an enjoyable time I had for my course creating various samples of layered, heat bonded, distressed and burnt fabric! I felt quite giddy towards the end - I am not sure if this was due to the fun I had or the fumes from heated and melted fabrics......

Once the samples were created I then photographed them against a "wall" of the conservatory - which worked really well as a makeshift "light box", resulting in some stunning formations and patterns.


The above sample was created by layering "wedding favour" tulle with Lutrador which I then heated with a heat gun, the heat gun distorted the tulle and created this wonderful copper effect with the lutrador. I then further distressed it with a soldering iron. The second photograph shows the stark contrast in appearance when light is shone from behind.


The photographs above show a sample which was a number of torn fabric strips including painted muslin, lutrador, and synthetic fabrics which I stitched together then distressed with a soldering iron. There is a real contrast between photographs of the piece with a dark background or with light behind.


 The following five photographs show a sample made from layers of wedding favour tulle which as been stitched together in layers trapping metallic threads and sequins between the layers. I have then distressed and slashed the fabric layers with the soldering iron. The final photograph shows how when held up to the light the metallic threads and sequins create dark points of interest in the overall image, whereas the colour is more prevalent in the samples without the light behind.


The following two photographs show a piece which seemed to develop its own theme without much effort! I stitched scraps of muslin together with a torn photograph, painted twyvek and wool tops, i think on reflection this piece looks almost as though the wind has blown the layers together. I then distressed the piece with a soldering iron. I think this sample could be developed further though stitching to echo the branches of the trees and possibly attaching it to a darker background


Although I am a real fan of colour, the below sample is my favourite of this set of samples. This was made by layering chiffon with netting and fusing it together with bondaweb, I then heated the whole sample with a heat gun resulting in this amazing puckering of the chiffon. Also attached to the chiffon are watercolour painted twyvek scraps which create further areas of light and dark when lit from behind.


 A few more samples created using the techniques referred to above


Monday, 17 September 2012

Fish Bag

As part of my Textiles Degree work I was required to design a functional item from scratch and include many of the techniques covered thus far in the course material. I decided I would like to create a bag and had been spending time sketching in koi carp and goldfish in a "Japanese" style using watercolours and pencil. The idea for the fish bag kind of carried itself along, resulting in the piece below, which I feel has a personality all of its own!

The "Live" side of the Fish Bag

Close up of the tail of the fish, I appliquéd, fabric painted and quilted the tail

I created the gills through fabric manipulation and folding, then added the  gold padded detail using hand stitched appliqué 

I freehand quilted the body of the fish and created the fins using the same techniques as the tail

Close up of the quilting hand painting and appliqué used to create the scales of the fish
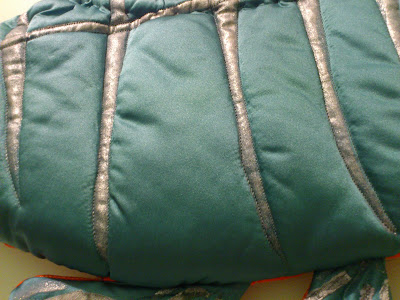
The reverse of the bag - Ghost Fish
I deliberately left the appliquéd edges and quilting rough to give the impression of decay

I chose a raw silk to give the feeling of cold, and and carefully quilted around the silver fabric paint to give the impression of a fish bone


Celebration Cushion

We were thrilled to be invited to a friend's wedding this weekend, we struggled to decide what to buy the happy couple, so decided a handmade gift was the way forward. In the end we decided on a personalised cosy cushion ans spent a very happy afternoon in the conservatory, just letting the piece develop by itself. Oh and the wedding was truly wonderful..........
I chose a fabric which I felt reflected the personality of the Bride, colourful and bubbly!

I did not attach the felt panel (made from a washing machine shrunk cardigan!) but simply overstitched it in multiple  different sewing machine stitches.

The colours of the machine embroidery were picked out from the vibrant colours of the cushion fabric

I personalised the cushion with the names of our friends and the wedding date


Monday, 10 September 2012

Peacock Cape

This piece was inspired by two things, my love of peacocks and my love of peacock tones of colour. I hand painted calico with a wash of fabric paint, then created a peacock feather stencil to create the "petals" for the cape. The cape shape was created following my discovery of the "Peacock Cape" sold at Christies a few years back, where each peacock feather has been hand sewn using actual peacock feathers as embroidery thread.

Miriam Ward Peacock Cape

Miriam Ward Peacock Cape

Miriam Ward Peacock Cape


Hardanger Interpretation

This is a piece I designed following research on textiles from other cultures. I was really intrigued by the pure white precise nature of the classic hardanger embroideries from Norway. I decided to experiment with colour and texture, while staying true to the ethos behind hardanger embroidery, that of arrangements of squares. I chose a mix of variegated threads and ribbons then painted the background canvas in toning colours. I then worked into the piece using knitting, crochet and traditional hardanger embroidery techniques to give it a contemporary twist.